How do I manage tasks (add new, edit, archive) in Webmail?
You can use tasks by creating them directly from the Task list or by saving an email as a task.
To create a task:
1. In the Task list, click on the Add task  icon.
icon.
icon.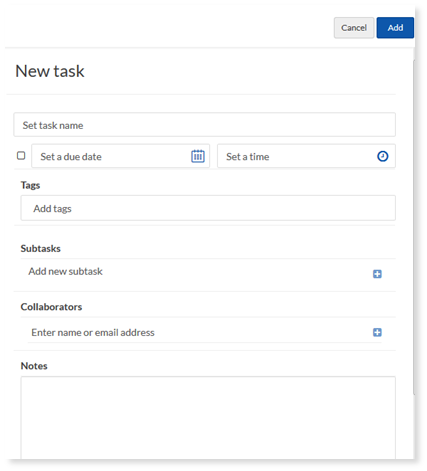
2. In the Add new task dialog, complete the following:
- Enter a name for the task.
- If the task has a due date, select the Due Date checkbox and select the date from the pop-up calendar.
- Add tag content to help you identify or search for your task.
- Enter any subtasks associated with this task and click the Add
 icon.
icon. - To remove a subtask, hover over the content and click the Trashcan
 icon.
icon. - Enter the name or email address for any other people associated with the task and click the Add
 icon (This feature is dependent on package availability).
 - To remove a collaborator, select Remove.
- To add an attachment to your task, click the Attachment
 icon and upload your file.
 - Enter a brief description of the task in the Notes.
3. Click Add.
To edit a task:
- In the Task View list, click on the Task that you want to edit.
- In the Task Details screen, make the required modifications and click Save.
To delete a task:
In the Task View list, hover over the task that you want to delete and click the Trashcan icon.
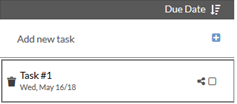
Alternatively, you can click on the Trashcan  icon within the Task Details screen.
icon within the Task Details screen.To archive a task:
- In the Task View list, click on the Task that you want to edit.
- In the Task Details screen, click on the Archive
 icon.
icon.